Monday, July 31, 2017

Falling Flowers - Just for You Note Card

Happy Monday stamping friends!
The summer is progressing and I am enjoying the sunshine with my family.

I am also enjoying playing with my stamps and inks and paper!  So I created a lovely little notecard today to share with you.  My inspiration was the card I made for the bloghop this past Saturday. I used the same color combination too!

Note card front

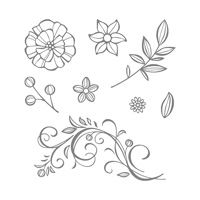
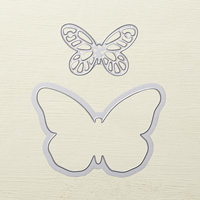
There are so many ways to use the stamps in the Stampin' Up! set, Falling Flowers (which, by the way, also has a matching die set - way cool!).  Today I only made use of one stamp in the set and then I complimented it with a greeting from my favourite Teeny Tiny Wishes stamp set (I love my wood mount stamps, I can't deny it - but luckily you can also get this set in the clear mount version  The butterfly was die cut from the Bold Butterflies framelit set and attached with my multipurpose glue.

Close-up

Inside of note card

Another view if inside of note card

Note card with matching envelope
Enjoy your week and see you again next week!


Stampin' Up! Products Used:
Tips and Tricks to recreate this card:
Cut:
Pear Pizzaz cardstock notecard base: 7" x 5 1/2" - scored in half along long side and then folded to create card base)
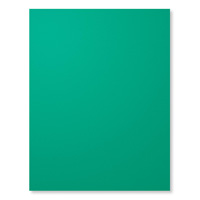
Emerald Envy cardstock mats: 2 x 5 1/4" x 3 1/4"  (die cut two butterflies from one, or each, of these mats)
Very Vanilla cardstock (or a very vanilla note card): 2 x 5 1/8" x 3 1/8"
Next:
1.  Stamp your very vanilla pieces with pear pizzaz ink as desired (see photos)
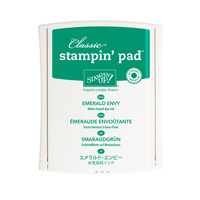
2.  Stamp greeting with Emerald Envy ink.
3.  Die cut butterfly from centre of one of the Emeral Envy cardstock mats.
4.  Glue your Emeral Envy mat pieces to the front and inside of your card base.
5.  Glue your stamped Very Vanilla cardstock pieces on top of your Emerald Envy pieces.
6.  Attach one die cut butterfly to the front of your card with multipurpose glue (only glue down the center of the butterfly body so the wings are free) and glue the other butterfly to the inside of the notecard.
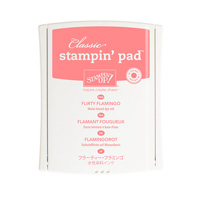
7.  Color flower buds with blender pen and Flirty Flamingo ink.
8.  Apply rhinestones to front of card.
9.  Stamp the front of your envelope.
You are done!  So how do you like your card?  Send out to someone you care about.

Saturday, July 29, 2017

Sea Shore Stampers Blog Hop - Birthdays

Happy Saturday stamping friends!


Welcome to July's Seashore Stampers' Blog Hop! 
This month our Seashore Stampers Group wishes to share ideas with you regarding birthdays.  My share is a birthday card, which I hope you recreate.  I used the wonderful Best Birds Stamp set from Stampin' Up! and I paired it with the Falling Flowers Stamp set.  Then I played with color and used inks and sponges and blender pen to add color to the stamped images.


Front of closed card

I used the same basic folded card format from my Christmas card here.  It's amazing what a different stamp set and color combination will do!


Card propped open
The matching die set really made cutting the tree branch, birds and flowers fast to cut out (I still miss my mini flower punches though).


Closer view of inside of card


Another view of open card


I absolutely loved making this card!!!  I really got wrapped up in the process of just having fun creating.  You might find that you can just keep going, and going, and going, changing out elements....okay, time to stop now. :)  

So, please carry on to the next stop on the hop and gather more birthday ideas for your summer creating pleasure!


Adrienne's Blog
Erica's Blog


Until next time,


Stampin' Up! Supplies Used:


Tips and Tricks to recreate this card:
Cut:
Pear Pizzaz cardbase:  11" x 4 1/4"
Emerald Envy cardstock mats:  5 1/4" x 4" and two pieces 4" x 2 1/2"
Very Vanilla cardstock mats/stamp pieces: 5 1/8" x 3 7/8"  and two pieces 3 7/8" x 2 3/8"
Scraps of Very Vanilla for stamped birds, tree limb and flowers
Next:

Monday, July 24, 2017

Floral Phrases Thank You Card

Hello stamping friends!
I had a busy work-week and a wonderful weekend: nice weather and fun play-time stamping with some stamping buddies.  How about you?

I want to show you a simple yet effective card I made using the Floral Phrases stamp set from Stampin' Up! and the Designer Series Paper Stack called Fresh Florals.  With a total of 40 sheets in a choice of five (5) colors, one has a lot of paper to play with!  By changing out the color combination, DSP paper design and greeting, you really have unlimited choices!
Card front


close-up of card front


Inside of card

Now go ahead and play yourself and see how easy it is to create this card! You'll be happy you did!
See you again next week!


Stampin' Up! Supplies Used:
Tips and Tricks to Recreate this Card (and many more.... :) )
Cut:
Sahara Sand cardstock card base:  11" x 4 1/4"
Whisper White cardstock for inside:  5 1/4" x 4"
Designer Series Paper strip:  2" x 5 1/4"
Strip of Whisper White cardstock 2" wide: to stamp floral design and punch out with 2" circle punch
Scrap of Blushing Bride cardstock: 2 1/4" circle punch
Scrap of Soft Suede cardstock:  2 1/2" circle punch
Next:
1. Score and fold your cardbase in half.
2.  Attach your DSP strip of paper.
3.  Ink up your choice of greeting with Soft Suede ink and stamp your greeting just above the DSP.
4.  Ink up your floral stamp with Blushing Bride ink and stamp onto the scrap of Whisper White cardstock. 
5.  Then also stamp the inside of your card and your envelope with same stamp and ink.
6.  Now punch out your stamped image with the 2" circle punch.
7.  Punch out a 2 1/4" circle from the scrap of Blushing Bride cardstock.
8.  Punch out a 2 1/2" circle from the scrap of Soft Suede cardstock. **Note: the 2 1/2" circle punch from Stampin' Up! is now retired so use whatever circle punch or die you have available to you.
9.  Now glue your circles together layering them as you see in the photo above.
10.  Attach your assembled circle art piece to your card with dimensionals.
11.  Add a bit of glitter to your stamped rose image by applying some Clear Wink of Stella!
Enjoy your hand made card and send it out out someone who deserves it!