Saturday, November 25, 2017

Sea Shore Stampers November 2017 Blog Hop - Christmas Gift Box

Hello happy stampers and welcome to the Sea Shore Stampers blog hop.  


This month our theme is Christmas cards and packaging!  Enjoy your hop  and I hope you are inspired!
Reusable gift box

Front view of box
My crafting idea is a quick and easy gift box using Stampin' Up!'s designer series paper.  You only need one 12" x 12" sheet of DSP and one 12" x 12" sheet of cardstock.  I followed the easy video instructions from Stampin' Up! and, if you want to wach it too, here is the link.

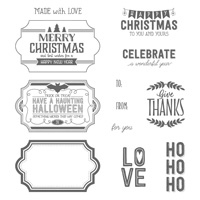
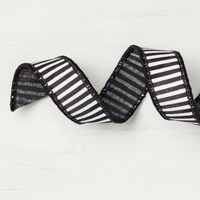
Once you have created your gift box, you can decorate it any way you wish:  I used my Stampin' Up! stamps, punch, ribbon and embellishments.  Thankfully, I still had enough of the black and white 7/8" striped ribbon to wrap around the box to create a sort of "belly band" to hold the gift box closed.  This way your recipient can reuse the box and pass it along to the next giftee :) 
Close-up of gift box topper
Enjoy the rest of the hop, and to our American stampers, wherever you are, I hope you have a wonderful Thanksgiving weekend!


Erica
Adrienne


Stampin' Up! Supplies Used:


Monday, November 20, 2017

Paper Pumpkin and Thanksgiving Idea

 Hello stampers and welcome!

Completed Paper Pumpkin projects from September 2017

I want to share with you the two projects from Stampin' Up!'s September Paper Pumpkin kit!  I am happy with the kit supplies and they create very cute 3" x 3" thank you cards and a mini gift box too!  I sent a set off to one my American friends who will be celebrating Thanksgiving later this week.

Close-up of the cute card in the kit

Close-up of pillow box in the kit

Have a wonderful week and see you next time.


Monday, November 6, 2017

Oh So Ecclectic Christmas Card

Hello Stamping Friends and thank you for stopping by for some inspiration!

Card front

Today's card is a christmas card using the Oh So Ecclectic stamp set from Stampin' Up! along with Merry Little Labels and Teeny Tiny Wishes.  I used a small piece from a sheet of the designer series paper called Naturally Ecclectic.

Close-up of stamped embellishment

Another close-up of card so you can see some
of the DSP and the placement of the Rhinestone Basic Jewels

Enjoy your crafting week and I look forward to seeing you next time!


Stampin' Up! Supplies Used:
Tips and Tricks to recreate this card:
Cut:
Tranquil Tide Cardstock cardbase:  8 1/2" x 5 1/2" and scrap piece for punched Everyday Label shape
Shimmery White cardstock:  5 1/4" x 4"
Whisper White cardstock for inside of card:  5 1/4" x 4" and scrap piece to stamp image and punch out using Every Label punch
Naturally Ecclectic DSP piece: 4" x 2 1/2"
Next:
1.  Fold cardbase in half and set aside
2.  Die cut ecclectic shape onto shimmery card stock as shown in photo.
3.  Using star stamp from Oh So Ecclectic stamp set and Pool Party ink, stamp stars diagonally across and over die cut image on shimmery white cardstock.
4.  Using Tranquil Tide ink, stamp greeting using Teeny Tiny Wishes stamp onto bottom right corner of shimmery white cardstock.
5.  Then stamp your "Let It Snow" image from the Merry Little Labels stamps onto your scrap of Whisper White cardstock.
6.  Using your Everyday Label punch, punch out the "Let It Snow" image and another "label" from your scrap piece of Tranquil Tide cardstock.
7.  Now attach your DSP piece to backside of diecut Shimmery White cardstock by placing Snail around the outside edge of the die cut (on the backside of cardstock), and then carefully placing and attaching your DSP over the Snail so you see your DSP peaking through on the front side of your Shimmery White cardstock.
8.  Now glue your "Let it Snow" punched shape to the Tranquil Tide punched shape with Snail.
9.  Now take a 7 1/2" piece of mini silver sequin trim and attach to backside of punched shape with Snail.
10. Now glue your shimmery white card piece to your Tranquil Tide card base.
11.  Apply Stampin' Dimensionals to the backside and over top of the trim and attach to your die cut card piece as shown in photos.
12.  Don't forget to add some bling - the Rhinestone Basic Jewels make this card sparkle!
13.  Stamp the inside Whisper White cardstock piece as desired and glue to inside of your card.
13.  Make and decorate your envelope.
You are done!  whoo-hoo - now you are on your way to creating christmas cards!  Love it!