Hello and Happy Monday!
Today I wish to share with you very cute and practical project I learned how to make at our Stampin' Up! Demo meeting held recently! Susan, thank you so much for sharing this with all of us!
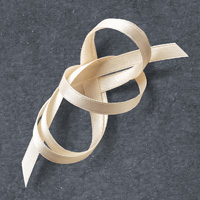
We had a variety of choices but this is the sweet little fridge magnet I made using some Stampin' Up! Designer Series Paper, ink, stamps, mat board and the Layering Squares Framelit dies.
What I found the most difficult was choosing the paper and stamps!!!! My suggestion to you, if you want to try this, pick your Designer Series Paper first, then one stamp set, and finally the matching inks - and stick to this choice!!! Otherwise you will spend the rest of your day switching out colors/stamps/ideas...you get the idea.
 |
| Decorated magnet |
Have a wonderful week and I hope you check back next time.
Tips to Recreate the Magnet:
First decide on the size of your magnet and cut your mat board to size 9. I used a piece that had been cut 3 1/2" x 3".
I covered this mat board with my chosen Designer Series Paper.
Then I used a variety of stamps and inks provided to recreate my art piece.
Then I attached that to the scalloped Early Expresso square mat.
Last, I glued on a piece of magnet sheeting to the back, which covered and helped secure, the rough edges of the Designer Series Paper.
See what your imagination can create.
Enjoy!
Happy Saturday Stampers!
I hope you had a great week!
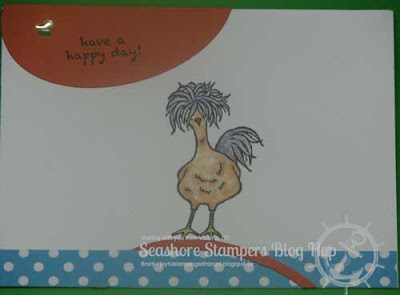
Today is the Seashore Stampers Bloghop and the theme is Easter!
I made a card after I was inspired by a really great video by Beth Rush from Beth's Paper Cuts!
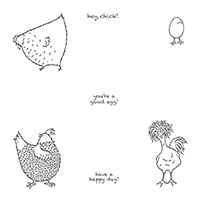
If you decide you want to make a similar card for your Easter Bunnies, please check out Beth's post and video - she provides really super instructions! I loved using the same Hey, Chick! stamp set from Stampin' Up! This chick has real character and she makes me giggle. I know exactly who will be getting a couple of these cards from me :)
 |
| Closed card |
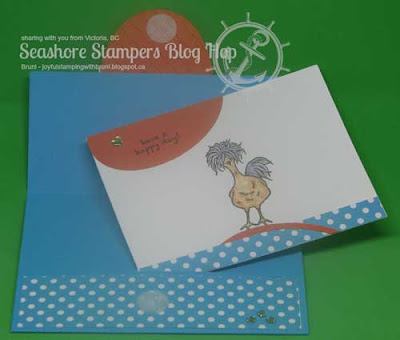 |
| Opened card with insert |
 |
| Close-up of Insert |
Have a wonderful week and I hope you stop by again soon!
Now , please hop on to the next blog on the hop:

Stampin' Up Supplies Used:
Tips and Tricks to recreate this card:
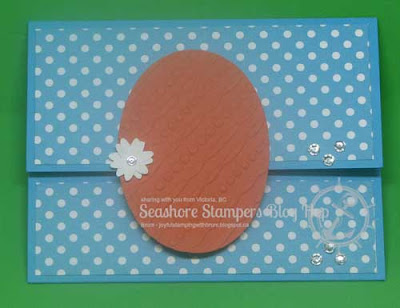
Cut:
Cardbase in Tempting Turquoise: 8 1/2" x 5 1/2"
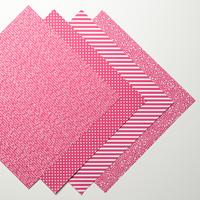
Brights Designer Series Paper Stack: 5 1/4" x 2 1/4" and 5 1/4" x 1 1/2"
Tangerine Tango strip to die cut larges oval from Layering Ovals die set
Whisper White for inside of card: 5" x 3 3/4"
Scrap of Whisper White to punch out smallest flower from the Blossom Punch.
I used the Festive Textured Impression Embossing Folder on the die cut egg shape and I glued the top portion of the egg to the top opening of the card front.
I used a velcro closure to keep the card closed.
I added rhinestone bling as desired.
I used blender pens and ink from the in pad lids to color in my chick.
I used a smaller oval to create the "pull" on the top of the insert.
I used a left over strip of the designer series paper stack along the bottom of the card insert and I glued on a left over curved strip of Tangerine Tango for the chick's "ground".
Happy Monday stamping friends!
I hope your week was enjoyable and that this week will be as well - we are heading into Spring and I sure am looking forward to sunnier weather!
This week I am sharing with you a special sympathy card someone in my circle of friends asked me to make. This type of card is not always easy to create but lately it has been needed far too many times.
Please enjoy your week, enjoy the start of Spring, and see you again soon.
Until next week,
Stampin' Up Supplies Used:
Happy Monday everyone!
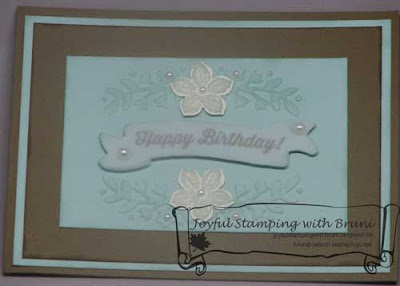
I am wishing for spring so I pulled out my long neglected Stampin' Up Embossing Folder called Foral Affection and created a very simple but elegant card. I had seen a picture of a similar card on the internet some time ago and I made a sketch of it. A happy thank you to the person who shared it with us on the Internet!
 |
| Card front |
 |
| Close-up |
Have a wonderful week!
Stampin' Up Products Used:
Tips and Tricks to Re-create this card:
Cut:
Card base in Soft Suede: 11" x 4 1/4"
Mat 1 in Pool Party: 5 1/4" x 4"
Mat 2 in Soft Suede: 5" x 3 3/4"
Focal piece (embossed and inked and decorated: 4" x 2 3/4"
Inside of card: Pool party (or Very Vanilla): 5 1/4" x 4"
Scrap strip 1 1/2" wide of Very Vanilla for the flowers
Scrap strip 1 1/2" wide of Pool Party and of Vellum for banner
Next:
1. Fold your card base in half to create card.
2. Glue your Mat 1 onto card base.
3. Sponge Mat 2 with Soft Suede ink using sponge dauber (or sponge) and then glue to card.
4. Emboss focal piece with the Floral Affection embossing folder.
5. Use Pool Party ink and sponge dauber to ink up the raised embossed image and edges of focal piece.
6. Glue to matted card base.
7. Use Pool Party ink and stamp two flowers using Petite Petals onto Very Vanilla cardstock and punch out.
8. Shape your punched flowers with embossing tool (end of your piercing tool or score tool will work!) by placing stamped flowers upside down onto your Stampin' Pierce mat and "shape" the petals by pushing the petal edges down into the mat with your "tool". Then turn flower over and press the center of each flower into the mat with your "tool".
9. Glue your flowers onto the the focal piece as shown in photo.
10. Stamp your greeting with Soft Suede ink onto scrap strip of Pool Party ink and then cut out banner shape.
11. Cut out an identical banner shape from vellum scrap.
12. Attach vellum banner over stamped banner using two glue dots on either end, which will be covered with a "pearl" (see photo).
13. Attach embellished banner onto your focal piece using Stampin' Dimensionals.
14. Attach the Basic Pearl Jewels to your focal piece as desired (look at photo for ideas).
15. Stamp some Petite Petal flowers to inside of card and your envelope as desired.
Enjoy your masterpiece!